5 Tips for Taking Better Travel Photos

Credit: Visit my Smokies.
Once upon a time, we lived in a world of film photography: purchasing rolls of film, loading that film into your camera, carefully taking pictures, and desperately hoping they would turn out alright whenever you did manage to get around to developing them.
Digital cameras changed the way we take pictures (for better or worse, I’ll leave that up to you). But the reality is, they offer an unprecedented opportunity for aspiring photographers to practice and perfect the art of photography, without breaking the bank.
Here are our five tried-and-true tips for taking better travel photos. But please note, I am not a professional photographer, just a traveller who loves capturing her adventures with a camera.
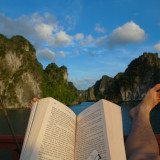
Tip #1: Create a story with your photographs

If you want your photos to look professional, approach them like a professional: tell a story. Often this happens naturally, but when you consciously think about taking a diverse range of photos, you’ll find yourself coming up with some really creative ideas. Credit: Victoria Boyd.
When aiming to improve your travel photos, it often helps to think of them as a collection of images that tell the story of your trip.
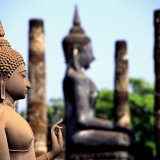
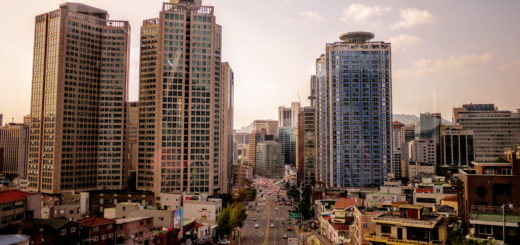
To showcase your destination, feature all of the elements (big or small) that stand out to you. Capture the iconic landmarks, but try shooting from a unique perspective. Zoom in on the smaller details, like a sign in a foreign language, local food or products, or the architectural details of a building that may often go unnoticed. Tie your images together by searching for common colors, patterns, or design elements.
By capturing the details that make a place unique, you’ll produce an array of varied photographs that weave a story of your journey. As an added bonus, this exercise will encourage you to see things you may have otherwise overlooked.
Tip #2: Move around

Changing my angle allowed me to capture the village on the hill without the frozen grapevines in the foreground. Credit: Erica Berta.
There’s almost nothing worse than thinking you’ve taken a great photo, only to open it on your computer and notice something in the frame completely ruins it. Perhaps it’s a dirty garbage can, an old car, or a tree in the background that, as a result of your unfortunate placement, ends up looking like a ridiculous hat on the top of a friend’s head.
Often a decent photo could have been an amazing one if you, the photographer, had just re-positioned yourself slightly. Before you start clicking, move around a little to see which angle creates the best frame.
Take a few steps forward or back, shift from side to side, stand up or crouch down. These small movements give control over the image. Stand up a little taller to capture the peak of a mountain behind a friend or shift to the side to avoid giving her that awkward “tree-hat”.
Tip #3: Take a lot of the same photo
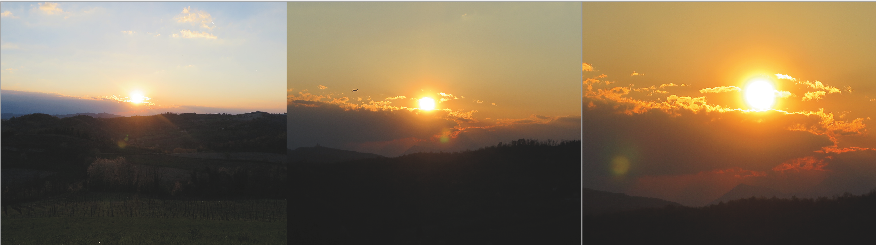
Three images of the same sunset taken within the span of a 30 seconds. The colours of the photo changed drastically depending on how zoomed in or out the camera was. Credit: Victoria Boyd.
Whenever my dad hands over his digital camera to a friendly stranger to have a family photo taken, he always tells them, “Take a bunch, they’re free!”. It sounds obvious, but it’s true. Gone are the days of paying to have rolls of film developed. One of the many perks of digital photography is that you can take as many photos as you want, with no consequences.
So take plenty. Take the same photo ten (or twenty) times. Zoom in, zoom out, play with the settings. Shoot the same scene over and over until you’re sure at least one shot is great. Because why not? They’re free after all.
The main reason I do this is because by simply zooming in and out or changing your angle slightly, you alter the amount of light entering the camera. A tiny shift in light can drastically improve an image, which leads us to my next tip…
Tip #4 – Lighting is key

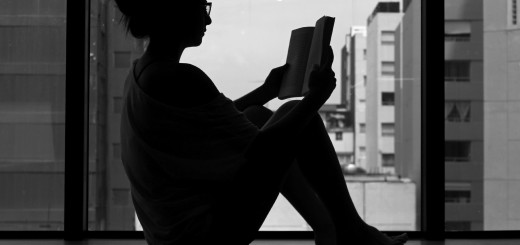
If you’re shooting outdoors, consider the time of day. The sun casts a more golden light at sunrise and sunset which can add a striking warmth to your pictures. Credit: Victoria Boyd.
Our eyes are much more clever than the lenses of our cameras. What you see is not necessarily the same as what your camera will reproduce. Although Photoshop can correct over- or underexposed images, a true photographer knows how to use light to their advantage.
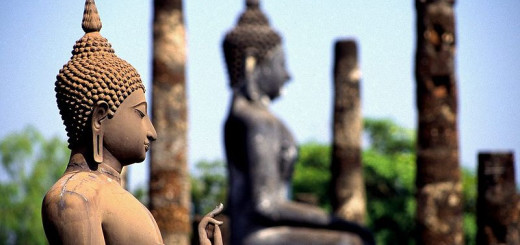
In order to do this, it’s crucial to locate your light source, whether it be the sun, a fire, or a lamp, and make note of how the light hits your subject.
For images of people, objects, or buildings, it’s often best to stand between the light source and your subject, so that the light falls directly onto the subject of the photo. If the light source is behind your subject, the subject will appear dark and shadowy. Experiment with light (using tips #2 and 3!) to get the desired effect.
With light comes shadows. Play with shadows in your images. Capture a friend’s tall shadow as she walks down a bright laneway at sunset or the shadow of one building on another. The contrast between shadows and light can create compelling photos.
Tip #5: Know when to lower your lens

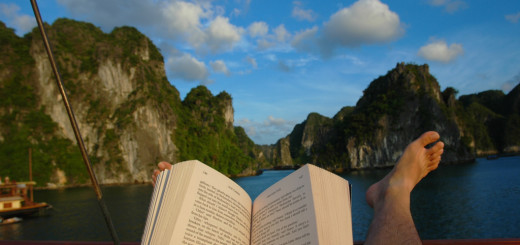
Know when to put your camera down and simply enjoy where you are and what you are doing in that moment. Credit: Christine from the Wallet Diet.
Every traveller needs to know when to lower their lens and take a mental photograph. Okay, this is not necessarily a tip for taking better pictures, but rather a tip for learning to truly make the most of your travels.
When something you see strikes you, take a moment to simply absorb and admire your surroundings. Take note of the tiny details you may have missed if you’d had your camera in your face. The sounds, the smells, the way you feel.
Consciously take a mental photograph and tuck it away in your memory. Often these types of “images” can be far more meaningful than a picture mixed up with hundreds of others in a folder on your computer.
Have a great travel photography tip? Please share it in the comments below!
Latest posts by Victoria Boyd (see all)
- Norway Untouched: A Journey into the Fjords - January 23, 2018
- Three Days, Three Cities: Belgium’s Brussels, Ghent and Bruges - December 12, 2017
- 5 Tips for Taking Better Travel Photos - November 14, 2017


 Almost all the tea houses in